
1
Create or Open Your Screenshot Project
Start with the app screenshot project you want to use for the App Store. Add the pages you need and prepare the main feature text, background and layout before refining the iPhone presentation.
RenderDuck lets you switch the device inside the editor from Android to iPhone. Open the 3D Phone Pose panel, select iPhone, choose the phone pose you want, and use that device setup to build polished App Store screenshot designs around your real app screens.
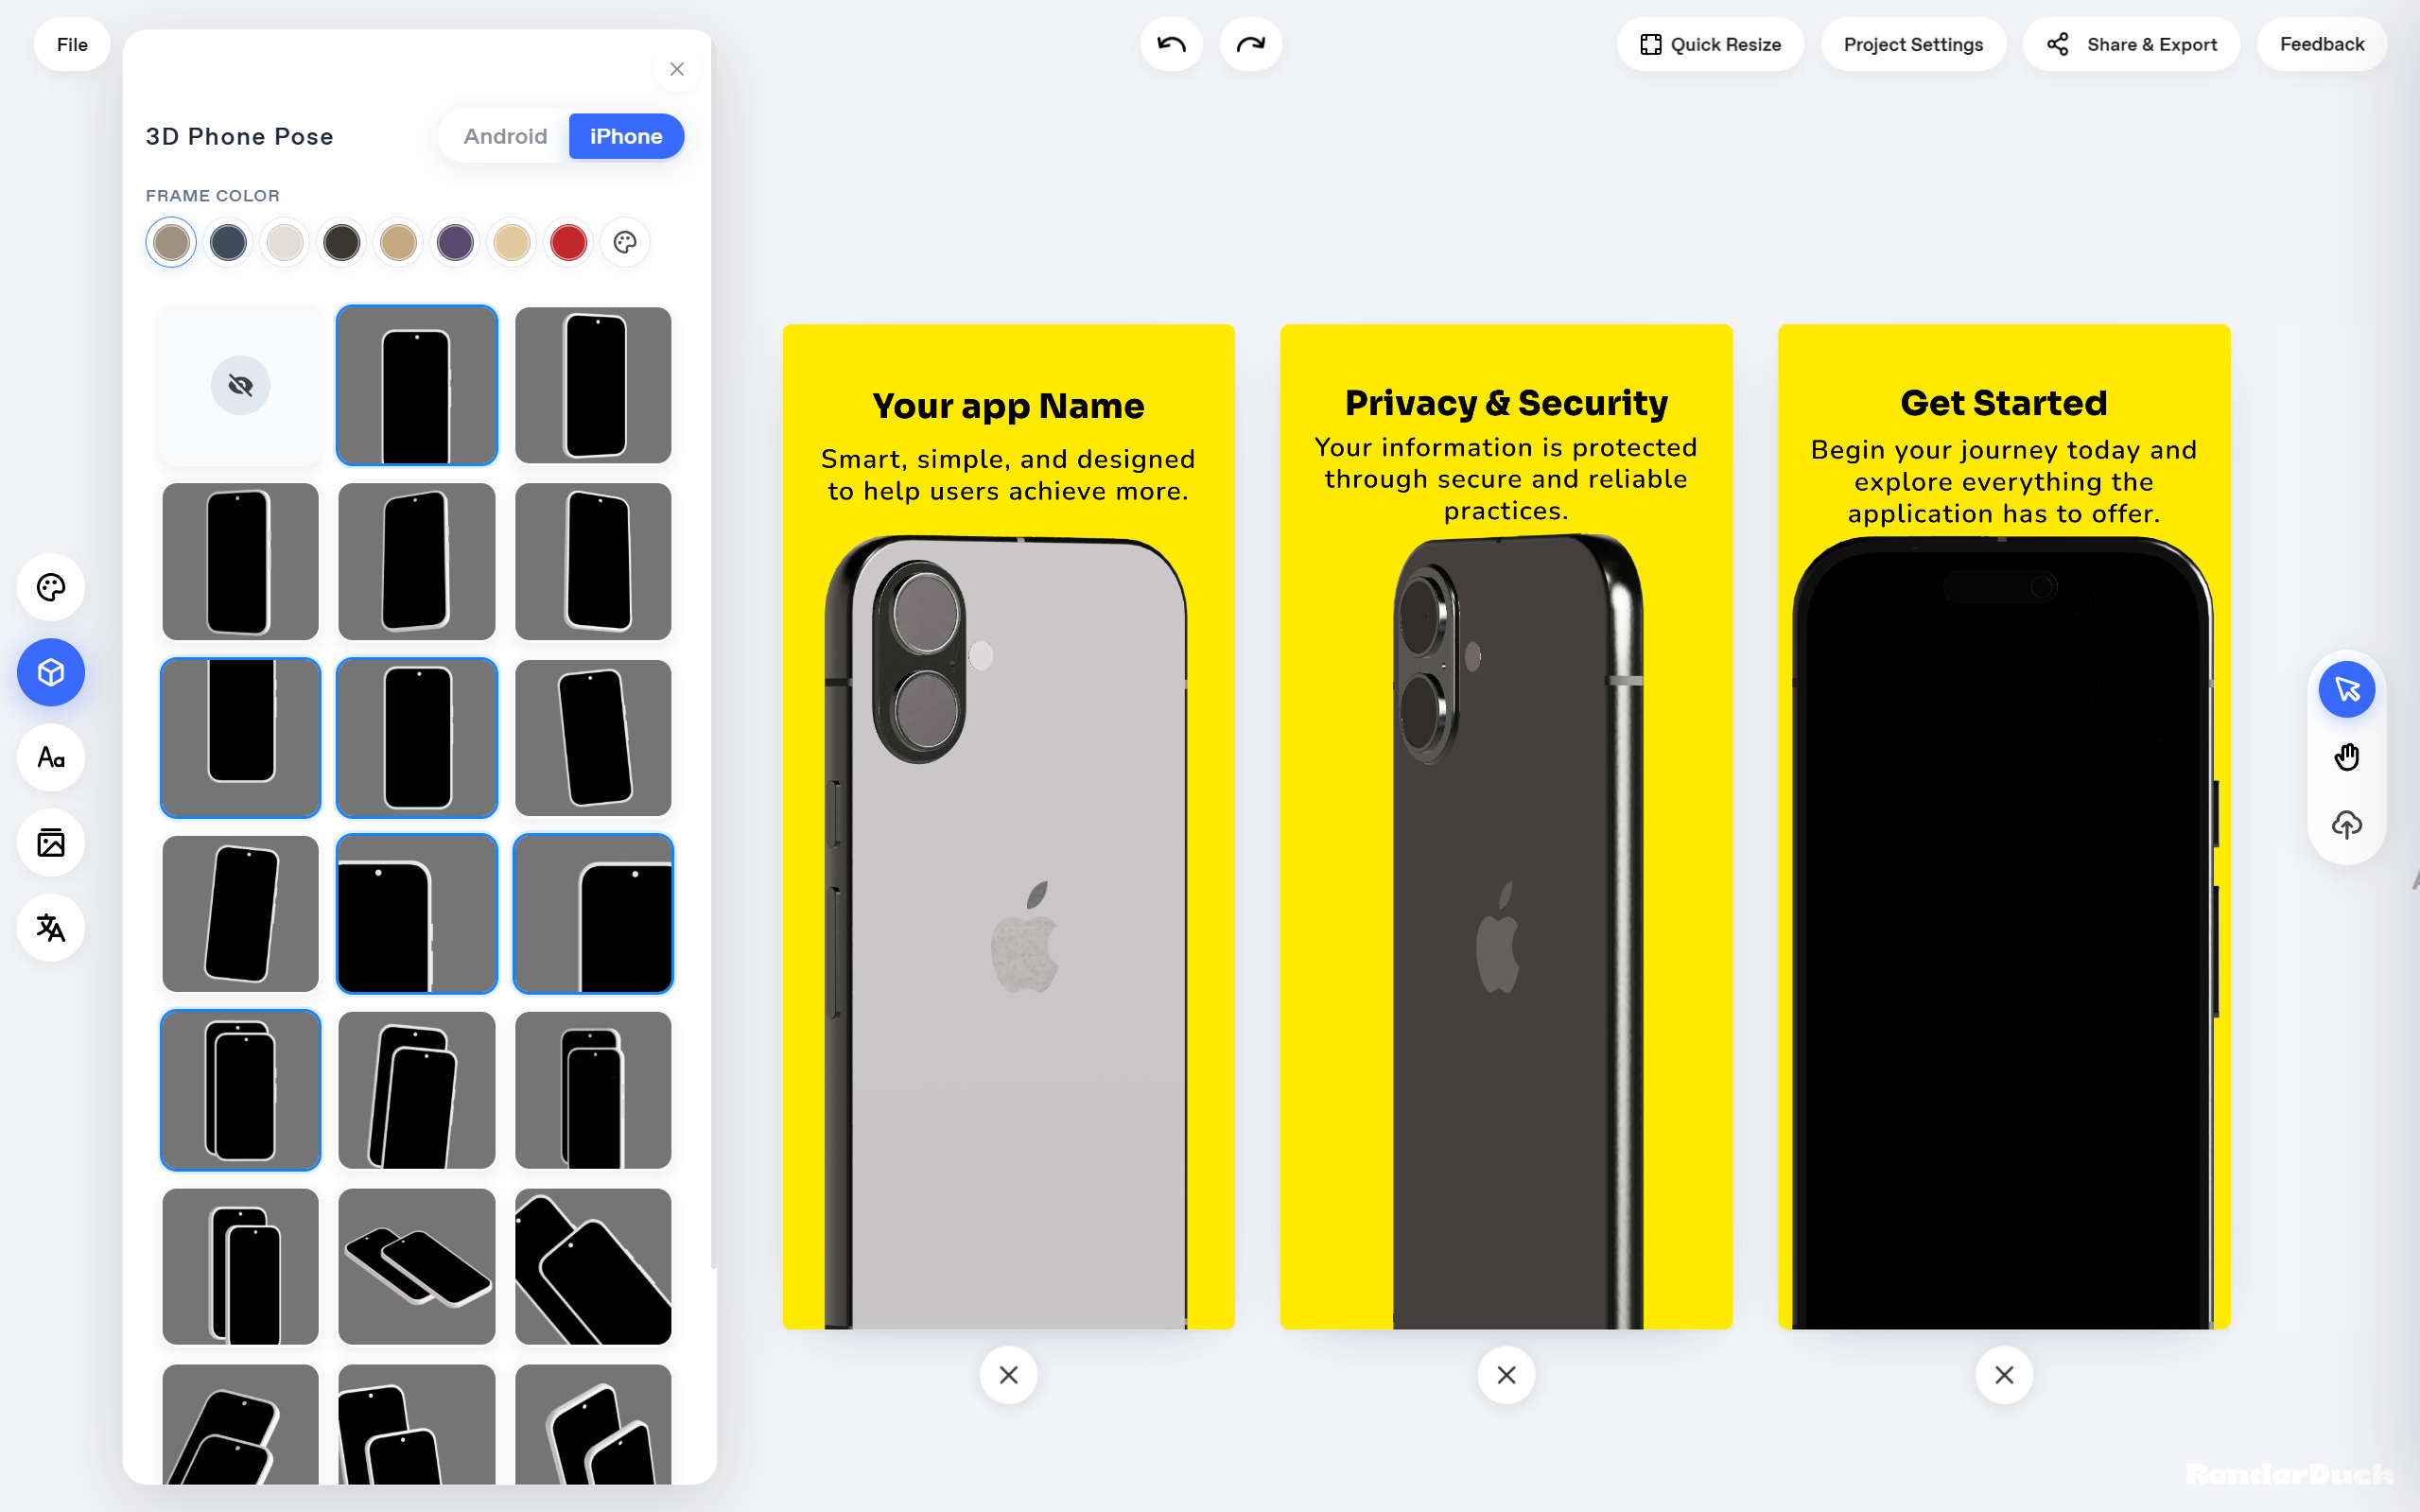
The main idea is simple: prepare your screenshot pages, switch the 3D device to iPhone, choose the presentation style, place the real app screen inside the device and finish the visual design.
Start with the app screenshot project you want to use for the App Store. Add the pages you need and prepare the main feature text, background and layout before refining the iPhone presentation.
In the editor’s left-side toolbar, open the 3D Phone Pose panel. This is where you control the type of phone model and how the device is presented inside the screenshot.
At the top of the 3D Phone Pose panel, choose iPhone. The available phone model changes to an iPhone presentation, making it suitable for your App Store screenshot design.
Select the pose that best fits the page. Use a straight front view when the interface should be easy to read, or a stronger 3D angle when you want the device itself to become part of the visual presentation. You can also change the frame color to match your brand.
Place your actual app screenshot inside the selected iPhone model. Then adjust the screenshot page around it—headline, supporting text, background and spacing—so the product screen remains clear.
Keep the same typography, color direction and spacing across the full screenshot sequence. You can vary the iPhone pose when it helps a specific page, but the set should still feel like one campaign.
Review the pages, make sure the app UI is readable, then use RenderDuck’s export workflow to download the screenshot pages you want to publish or reuse in your marketing.
A single screenshot design can look very different depending on the device presentation. The iPhone option lets you build an Apple-focused visual style without rebuilding the full screenshot composition from the beginning.
The phone model is only one part of the design. Combine it with the rest of the RenderDuck editor to create a complete App Store screenshot campaign.
Switch the 3D device from Android to iPhone for an Apple-focused screenshot presentation.
Choose from multiple device poses, including straight, angled, close-up and more dramatic compositions.
Pick a phone frame color that fits the screenshot background and your app’s visual identity.
Insert the real product screenshot so the design showcases the actual app experience.
Add a clear headline and short supporting message to explain what each screenshot is showing.
Build multiple pages and keep the same design language across the entire App Store presentation.
A stronger device angle can make the page more visually interesting, but the app itself still needs to remain understandable.
When the screenshot contains small text, forms, charts or important controls, a straighter iPhone view usually keeps the interface easier to understand.
A stronger 3D angle works well when the page is mainly selling one feature, a launch message or a visual moment.
The frame color should support the background and app branding instead of becoming the most noticeable element on the page.
Open the 3D Phone Pose panel in the left-side menu and select the iPhone tab at the top.
Yes. The 3D Phone Pose panel shows multiple iPhone poses so you can choose a straight, angled or more dramatic presentation for each screenshot page.
Yes. The frame-color controls are shown directly inside the 3D Phone Pose panel.
No. You can vary the pose when needed, but keeping the overall typography, colors and visual hierarchy consistent helps the pages feel like one screenshot campaign.
Yes. RenderDuck supports multiple screenshot pages in one project, so you can build a complete App Store screenshot sequence.
Switch the device to iPhone, choose the 3D pose, add your real app screen and build a consistent screenshot campaign directly in RenderDuck.
Start Creating